Splines (Beizer) |
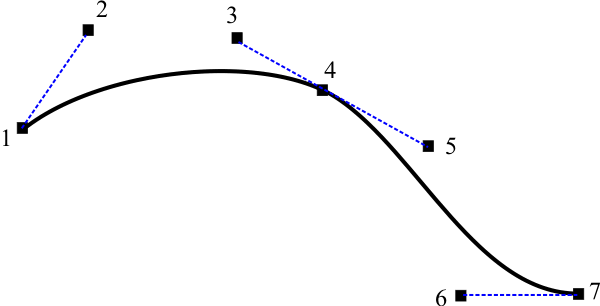
| The Bezier is popular in computer graphics. It is a curve that has some control points that allow creating any contour with smooth borders that look nice. To draw objects that cannot be created using basic shapes (straight lines, rectangles, circles, etc.) splines (third order polynomials) are used. To draw a spline, it is required: an initial point, an end point and two control points as shown below. Usually, the order of these points is: initial point, control point, control point, end point. When many splines are drawn one after the other, the end point of the first one is the same as the initial point of the second one. Generally, splines look nice because the curvature in the transition point between two splines is smooth. El Bezier es popular en programación de gráficos en computadora. Es una curva que tiene unos puntos de control que permiten crear cualquier contorno con bordes suaves y agradables a la vista. Para dibujar objetos que no pueden ser dibujados con objetos básicos (líneas rectas, rectángulos, círculos, etc.) se usan las splines (curvas polinomiales de tercer orden). Para dibuja una spline se requiere proporcionar las coordenadas del punto inicial, del punto final y de dos puntos de control como se muestra debajo. Usualmente el orden de estos puntos es: punto inicial, punto de control, punto de control y punto final. Cuando se dibuja un spline atrás del otro, el punto final del primero es el mismo que el punto inicial del segundo. En general, las splines son agradables a la vista por que la curvatura en el punto de transición entre dos splines es suave. |
| Problem 1 |
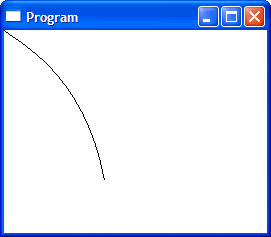
| Create a Window Application using Wintempla called Bezi to draw a bezier as shown below. Cree una aplicación de ventana usando Wintempla llamada Bezi para dibujar un bezier como se muestra debajo. |
| Bezi.cpp |
| void Bezi::Window_Paint(Win::Event& e) { CG::Gdi gdi(hWnd, true, false); POINT point[4]; point[0].x = 0; //Initial Point point[0].y = 0; // point[1].x = 10; //Control Point 1 point[1].y = 10; // point[2].x = 80; //Control Point 2 point[2].y = 40; // point[3].x = 100; //End Point point[3].y = 150; gdi.PolyBezier(point, 4); } |
| Tip |
| Beziers may be created by vector graphics program such as: Adobe Illustrator, Corel Draw, or AutoCAD. Los beziers pueden ser creados usando programas de gráficos vectoriales tal como: Adobe Illustrator, Corel Draw o AutoCAD. |
Scalable Vector Graphics (SVG) |
| SVG is a format to store a vector image in a text file using XML. Most Internet browser can display SVG files. As the image can be scaled without losing resolution, they are very popular in drawing. Adobe Illustrator, Corel Draw and AutoCAD can export an existing drawing to SVG. El formato de SVG se usa para almacenar imágenes vectoriales en un archivo de texto usando XML. La mayoría de los exploradores de la Internet pueden desplegar archivos SVG. Como la imagen puede ser escalada sin perder resolución, estos son muy populares en dibujo. Adobe Illustrator, Corel Draw y AutoCAD pueden exportar un dibujo existente a SVG. |
| Problem 2 |
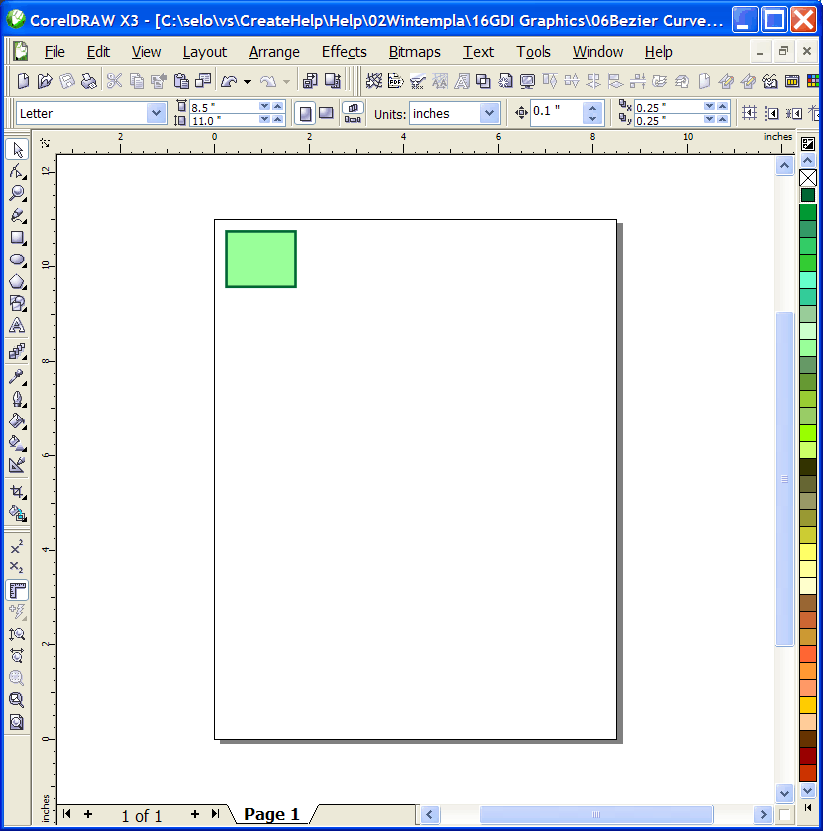
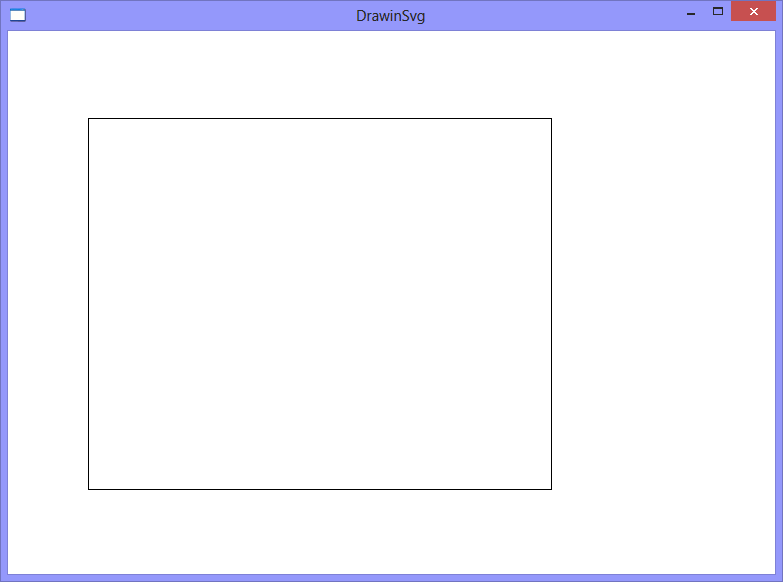
| Create a Window Application using Wintempla called DrawingSvg to draw a box as shown below. Cree una aplicación de ventana usando Wintempla llamada DrawingSvg para dibujar una caja como se muestra debajo. |
| Solution 2.A. |
| Using Corel Draw draw a box as shown below. Usando Corel dibuje una caja como se muestra debajo. |
| Solution 2.B. |
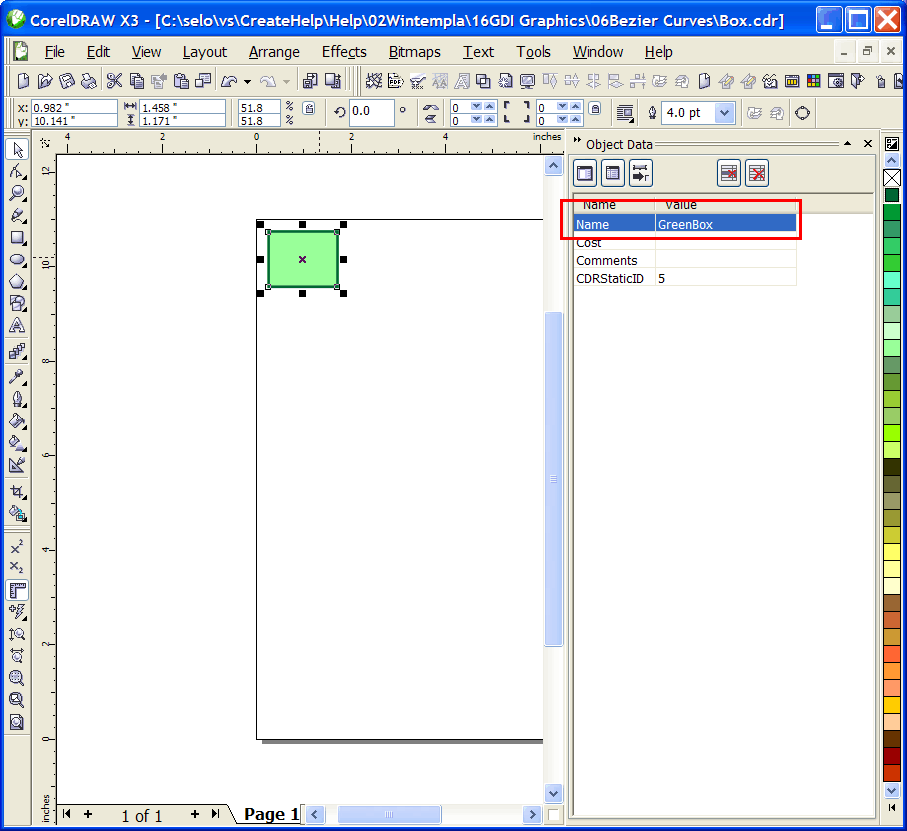
| From the Windows Menu (Windows>Dockers>Object Data Manager). Once the Object Data Manager is open, click the green box to select it. Finally, set the name to GreenBox as shown. Save the drawing in a file called Box.cdr. Desde el menú de Ventanas (Windows>Dockers>Object Data Manager). Una vez que el Object Data Manager está abierto, haga clic en la caja verde para seleccionarla. Finalmente, fije el nombre a GreenBox como se muestra. Guarde el dibujo en un archivo llamado Box.cdr. |
| Solution 2.C. |
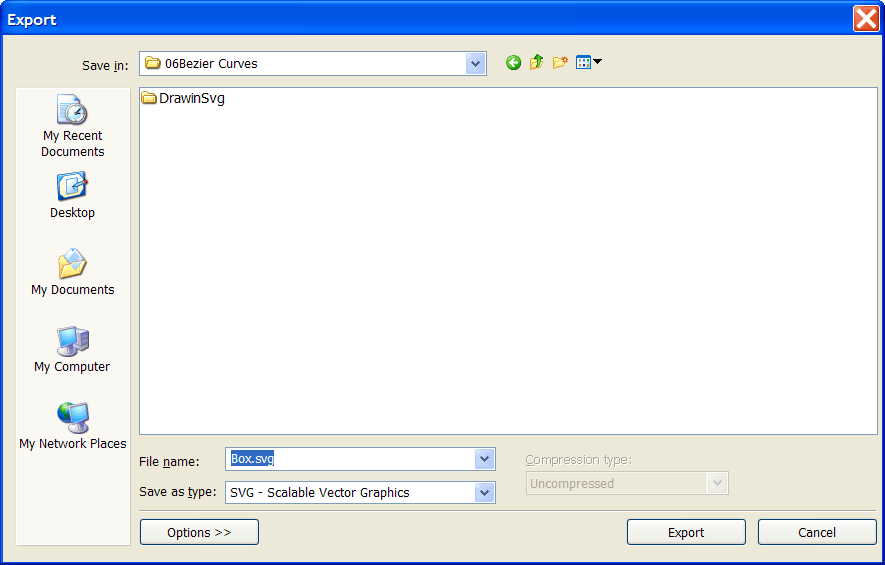
| Using Corel Draw and the Export option from the menu export the drawing to SVG. Usando Corel y la opción de Exportar desde el menú exporte el dibujo a SVG. |

| Tip |
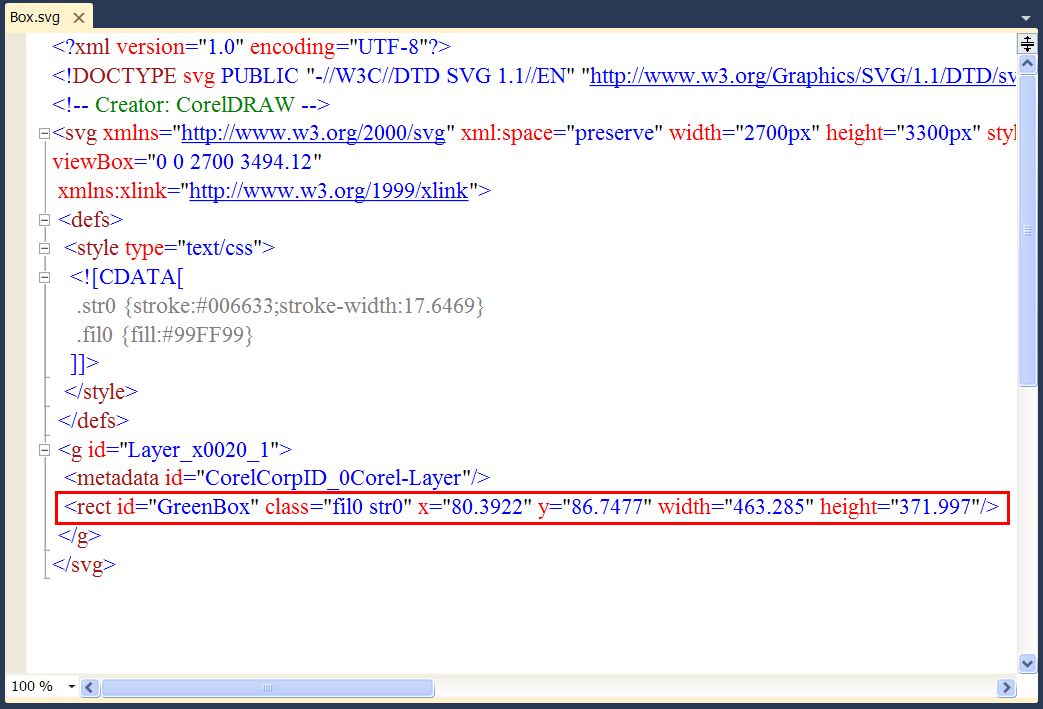
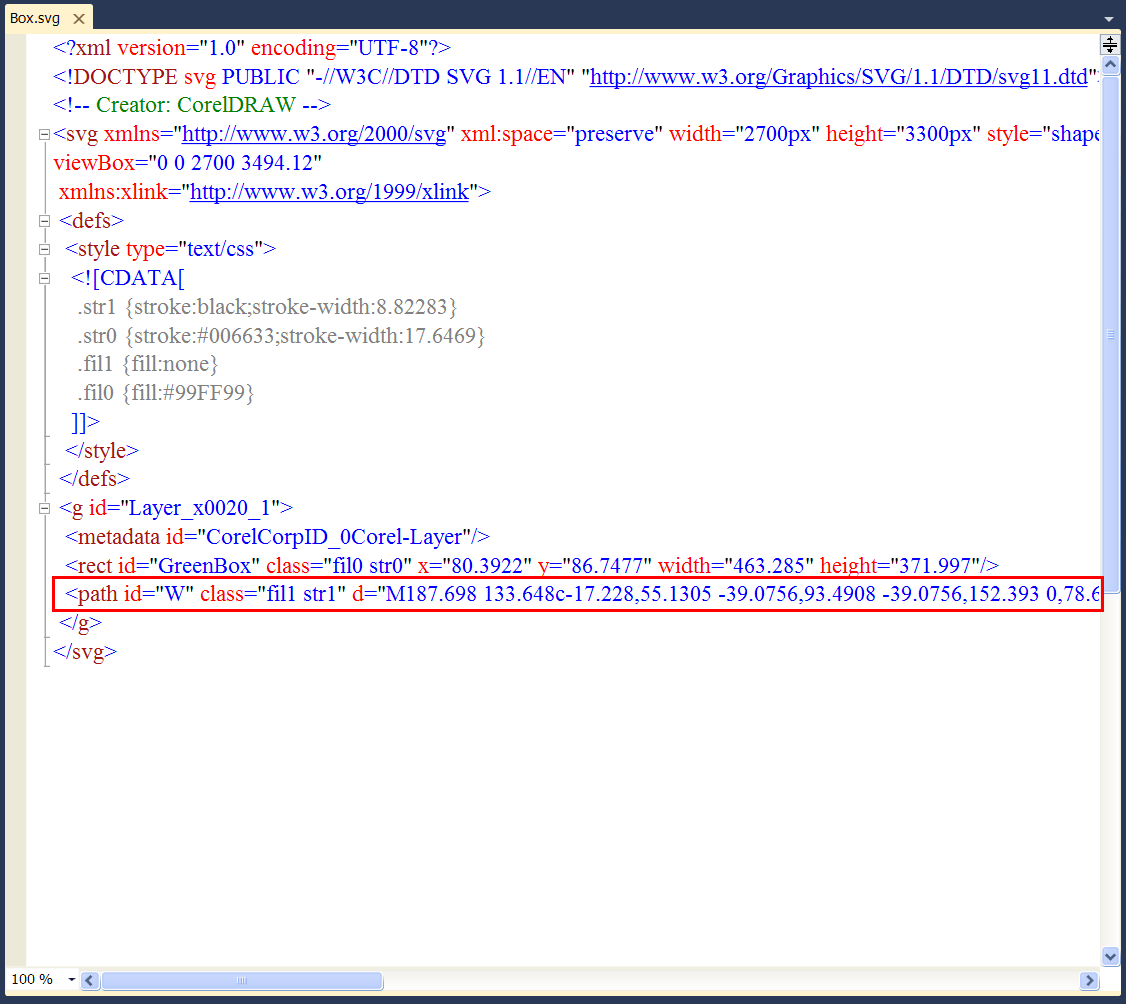
| The SVG file is a text file that contains information about the drawing. In this case, we care about the <rect id="GreenBox" ... > tag that includes the position and dimension of the box. El archivo SVG es un archivo de texto que contiene información acerca del dibujo. En este caso, nos interesa la etiqueta <rect id="GreenBox"...> que incluye la posición y dimensiones de la caja. |
| Solution 2.D. |
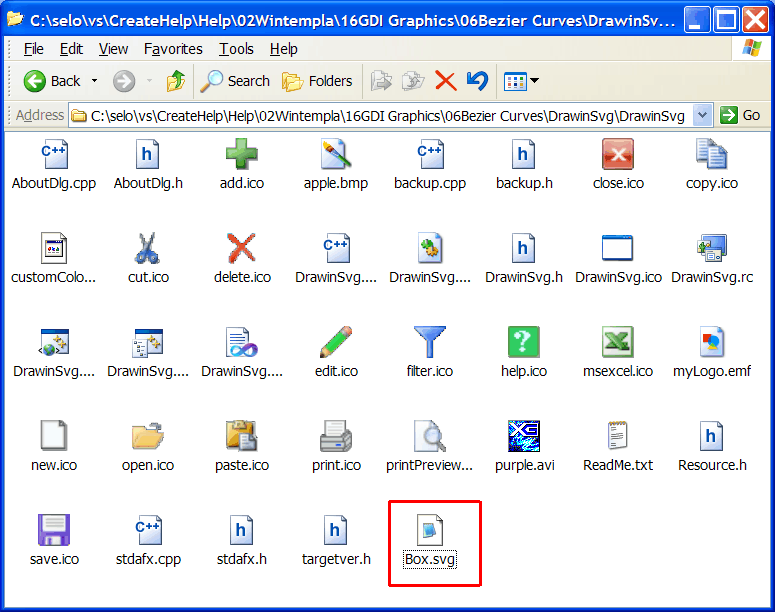
| Copy the Box.svg file from its current location to the DrawingSvg project folder as shown below. Copie el archivo Box.svg desde su localidad actual a la carpeta del proyecto DrawingSvg como se muestra debajo. |
| Solution 2.E. |
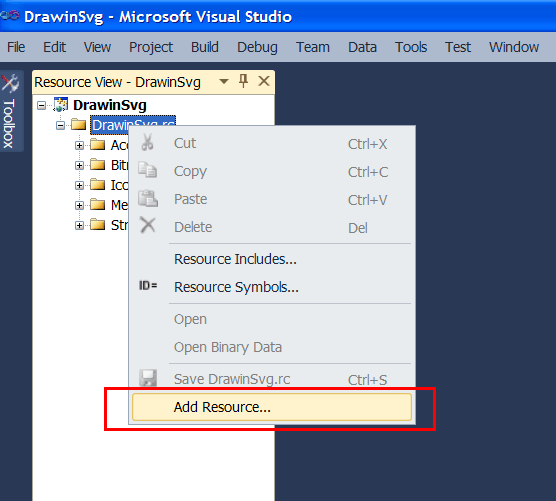
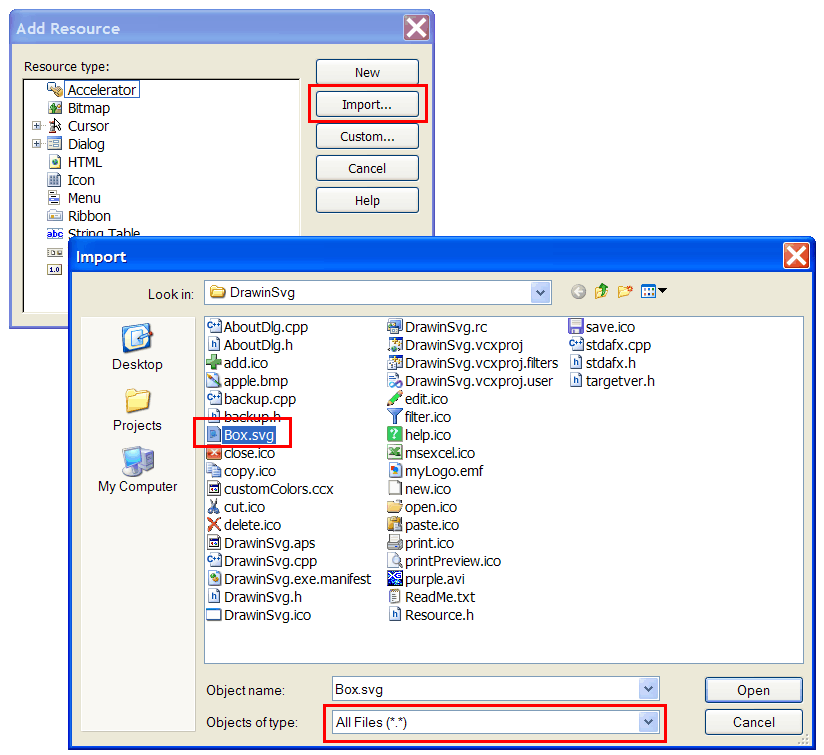
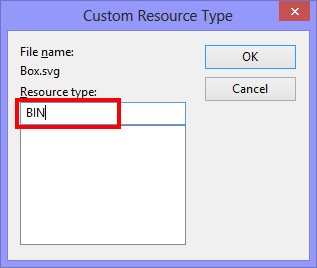
| In Microsoft Visual Studio open the Resource View. Once Resource View is open, use the context menu and select the option Add Resource... as shown. Press the Import button, and select the Box.svg file as shown. When ask for the custom resource type, write BIN. En Microsoft Visual Studio abra la Vista de Recursos. Una vez que la Vista de Recursos está abierta, usa el menú de contexto y seleccione la opción Add Resource... como muestra. Presione el botón de Importar, y seleccione el archivo Box.svg como se muestra. Cuando se le pregunte por el tipo del recurso personalizado, escriba BIN. |
| Solution 2.F. |
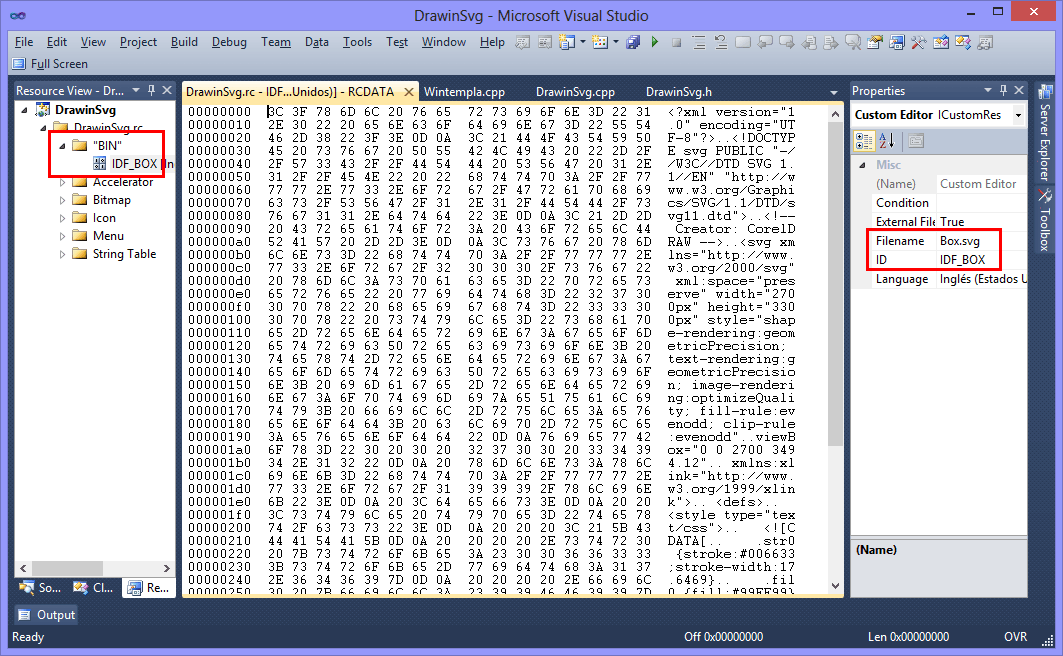
| Using the Properties View set the name of the resource: IDF_BOX. Usando la Vista de Propiedades fije el nombre del recurso: IDF_BOX. |
| Solution 2.G. |
| Edit the DrawinSvg.h file as shown. Edita el archivo DrawinSvg.h como se muestra. |
| DrawinSvg.h |
| #pragma once //______________________________________ DrawinSvg.h #include "resource.h" class DrawinSvg: public Win::Window { public: DrawinSvg() { } ~DrawinSvg() { } RECT rect; const wchar_t * GetClassName(){return L"DRAWINSVG";} ... }; |
| Solution 2.H. |
| Edit the DrawinSvg.cpp file as shown. Observe that we do not care about the rectangle appearance, just the position and size. Edita el archivo DrawinSvg.cpp como se muestra. Observe que no nos interesa la apariencia del rectángulo, solamente su posición y tamaño. |
| DrawinSvg.cpp |
| ... void DrawinSvg::Window_Open(Win::Event& e) { Sys::SvgReader svg; const wchar_t* error = svg.LoadFromResource(true, this->hInstance, IDF_BOX); if (error != NULL) { this->MessageBox(error, L"SVG resource: IDF_BOX/box.svg", MB_OK | MB_ICONERROR); } //____________________________________________________ Green Box double scale = 1.0; if (svg.GetRectangle(L"GreenBox", scale, rect) == false) { this->MessageBox(L"The GreenBox rectangle could not be found", L"DrawingSvg", MB_OK | MB_ICONERROR); } this->Repaint(NULL, true); } void DrawinSvg::Window_Paint(Win::Event& e) { CG::Gdi gdi(hWnd, true, false); gdi.Rectangle(rect); } |
| Tip |
| Usually, we would use an SVG file to draw a complex objet with many beziers in a program. Usualmente, nosotros usaríamos un archivo SVG para dibujar un objeto complejo con varios beziers en un programa. |
| Problem 3 |
| Drawing a bezier in the previous problem. Dibujando un bezier en el problema anterior. |
| Solution 3 |
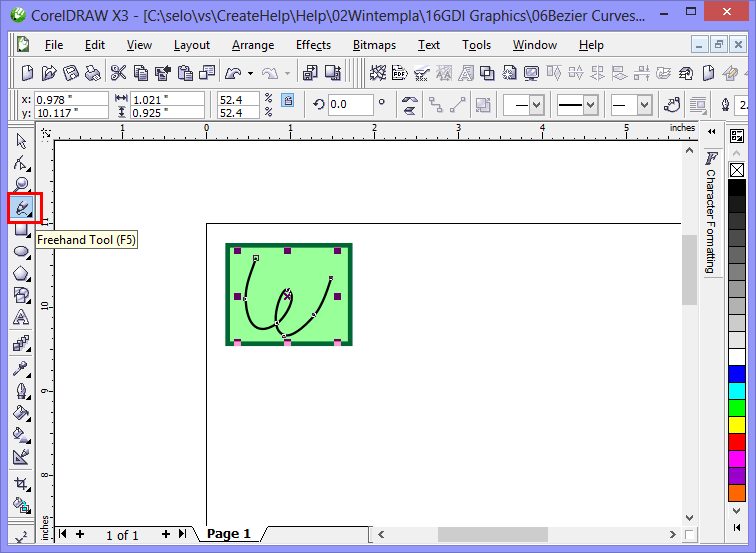
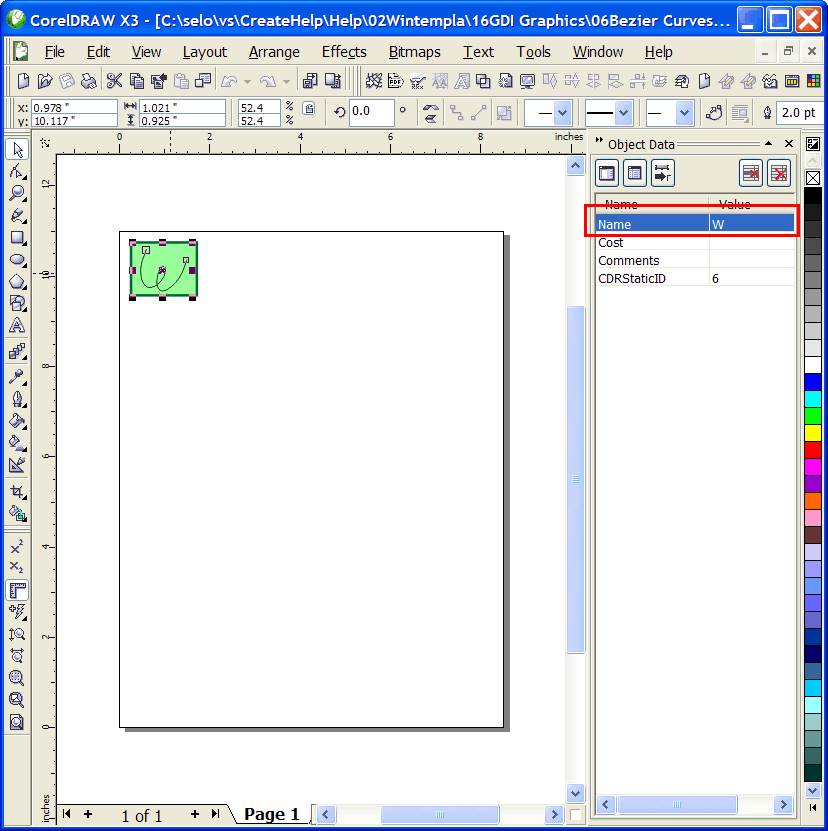
| Open the Box.cdr file using Corel Draw. Using the Free Hand tool (Pencil on the left toolbar) draw a bezier as shown. Set the name to W and export to SVG to the folder of the DrawingSvg project. Abra el archivo Box.cdr usando Corel Draw. Usando la herramienta de Mano Libre (Lápiz en la barra de herramientas de la izquierda) dibuje un bezier como se muestra. Fije el nombre a W y exporte a SVG en la carpeta del proyecto DrawingSvg. |

| DrawinSvg.h |
| #pragma once //______________________________________ DrawinSvg.h #include "resource.h" class DrawinSvg: public Win::Window { public: DrawinSvg() { } ~DrawinSvg() { } RECT rect; Sys::PointArray pathW; const wchar_t * GetClassName(){return L"DRAWINSVG";} ... }; |
| DrawinSvg.cpp |
| ... void DrawinSvg::Window_Open(Win::Event& e) { Sys::SvgReader svg; const wchar_t* error = svg.LoadFromResource(true, this->hInstance, IDF_BOX); if (error != NULL) { this->MessageBox(error, L"SVG resource: IDF_BOX/box.svg", MB_OK | MB_ICONERROR); } //____________________________________________________ Green Box double scale = 1.0; if (svg.GetRectangle(L"GreenBox", scale, rect) == false) { this->MessageBox(L"The GreenBox rectangle could not be found", L"DrawingSvg", MB_OK | MB_ICONERROR); } //____________________________________________________ Bezier W wstring type; if (svg.GetPathPoints(L"W", scale, pathW, type) == false) { this->MessageBox(L"The W bezier could not be found", L"DrawingSvg", MB_OK | MB_ICONERROR); } const size_t count = type.size(); for(size_t i = 0; i < count; i++) { if (type[i] != L'c') { this->MessageBox(L"The path must have only 'c' ", L"DrawingSvg", MB_OK | MB_ICONERROR); break; } } this->Repaint(NULL, true); } void DrawinSvg::Window_Paint(Win::Event& e) { gdi.Rectangle(rect); gdi.PolyBezier(bezierW); } |
SVG Tags |
Wintempla supports the following SVG tags:
Wintempla soporta las siguientes etiquetas de SVG:
|
| Tip |
| To fill a bezier object that is a closed, use the function Gdi::FillPolyBezier. Para rellenar un objeto bezier que está cerrado, use la función Gdi::FillPolyBezier. |